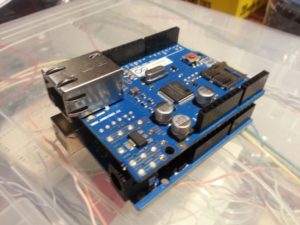
June 28, 2013
This is to help others figure out how to send data from an
ARDUINO with ETHERNET to a MySQL database
via the POST method through a PHP page.

I am not an expert.
I am just a hack.
I do not understand all of the code nuance.
I take what others have done, substitute my variables and modify the code to my requirements.
There are a million ways to skin a cat.
This is one way that I have muddled through.
I don’t go into how to set up a MySQL data base, try google.
ARDUINO CODE
#include <SPI.h>
#include <Ethernet.h>


int bstate = 0;         // This is the variable we will send, but it will be formated as String first.
String txData ="";      // This is the Data that will be sent to the PHP page. It will have variable names and data in it.

                        // Local Network Settings
                        // My mac 90-A2-DA-0D-83-9D Must be unique on local network
                        // (should be on the back of ethernet shield)
byte mac[]     = { 0x90, 0xA2, 0xDA, 0x0D, 0x83, 0x9D };

byte ip[]      = { 192, 168,   1,  199 };       // Must be unique on local network
byte gateway[] = { 192, 168,   1,  1 };         // I left these in for reference in case you need them
byte subnet[]  = { 255, 255, 255,   0 };        // I left these in for reference in case you need them


void setup()
{
     Ethernet.begin(mac, ip); // Mine works with just the mac and ip. Gateway and DNS may be needed.
                              //Depending on your router setup, you may need to
                              // reference http://arduino.cc/en/Reference/EthernetBegin


     Serial.begin(9600);      // Just for output so we can see if its working
     delay(1000);
}

void loop()
{
     bstate++;               //  This just adds one to the variable "bstate" each time thru the loop. I just did this for testing
                             // I send the data as a String. I read about some having difficulties sending integers.
                             // 'txData' is a string that is sent to the PHP page.

     txData = "BUTTON_STATE="+ (String (bstate));

                              // 'BUTTON_STATE' is the POST variable that the PHP page is looking for.
                              // The '+' puts the string parts together.
                              //  '(String (bstate))' formats 'bstate' from a numerical value to a string.
                              // Multiples would look like
                              //txData = "VARIABLE1="+ (String (var1))+"&VARIABLE2=" (String(var2));

     EthernetClient client;

                                         //("yourwebsite.com",80) could also be, I think an IP, (xxx.xxx.xxx.xxx,80) or
                                         // you could define a variable 'server' like we did with 'ip' and 'mac'
                                         // like this, 'byte server[]  = { xxx, xxx, xxx, xxx }'
                                         // then this line would look like  'if (client.connect(server,80))'

    if (client.connect("yourwebsite.com",80))
    {
         Serial.println("Connected to yourwebsite...");   // This isn't required, just for feedback
         Serial.println();


                                       // HERE IS THE MEAT AND GRAVEY
                                       // The '/update/update.php' is the directory and file you are sending to
                                       // if the file is in the root of the domain it would just be '/update.php'

          client.print("POST /update/update.php HTTP/1.1\n");

                                       //  yourwebsite.com, domain where the php file is hosted

          client.print("Host: yourwebsite.com\n");
          client.print("Connection: close\n");
          client.print("Content-Type: application/x-www-form-urlencoded\n");
          client.print("Content-Length: ");

                                       // Remember our variable txData? It has all of the info we are sending
                                       // to the PHP page, 'update.php'.  BUT, the PHP page needs to know how many characters
                                       // are coming. We give it by using 'txData.length()'

          client.print(txData.length());
          client.print("\n\n");
          client.print(txData);         // after all of the required junk we send the data
    }
    else
    {
         Serial.println("Connection Failed."); // Again the Serial is for feedback.
         Serial.println();
    }
    delay(5000); //this delay was for my test to send a number every 5 sec
}
Next…
Make a PHP file called config.php.
CODE for config.php
<?php

$dbhost = 'localhost'; //mysql server address, it can be an ip address typically it is 'localhost'
                                                // It could look like 'mysqlserver.mydomain.com'
                                                    // To access the mysql database you need a username and password
$dbuser = 'mydatabase_username';
$dbpass = 'mydatabase_password';
$dbname = 'mydatabase_name'; //This is the name of your database on the mysql server

$conn = mysql_connect($dbhost, $dbuser, $dbpass) or die ('Error connecting to mysql');
mysql_select_db($dbname);
?>
AND ‘DEN…
Make a file called update.php
CODE for update.php
<?php
require("config.php");
// You need to create a table on your MySql server database. Here it is called 'MY_TABLE'.
              // You will also have to define fields in the table.
             //I happen to name my fields the same as my POST variables.


$query = "INSERT INTO MY_TABLE(BUTTON_STATE)
                  VALUES('$_POST[BUTTON_STATE]')";


 if(!@mysql_query($query))
{
    echo "&Answer; SQL Error - ".mysql_error();
    return;
}
?>
NOTES
Multiple variables being posted might look like…
$query = "INSERT INTO MY_TABLE(VAR1, VAR2, VAR3)

  VALUES('$_POST[VAR1]','$_POST[VAR2]','$_POST[VAR3]')";
In PHP you can break lines for readability.
End of line or statement is denoted by a semicolon.
This worked out wonderfully for me! Thanks for posting this.
Sykey,
Glad to have been a help.
What’s your Arduino Project?…If you want to share.
~Fess
Where do i put the first script, which directory and the name?
Tonnie, if you are referring to the config.php file, it can go anywhere on your web server as long as the call for it, in the update.php file, has the directory with the name.
Example:
If config.php is a subdirectory called “configs”
The require statement in update.php would look like this…
require(“configs/config.php”);
~Fess
It is excellent and very simple, thank you very much.
Now the request: I can connect my Arduino (MEGA2560) and my Crestron processor (QM-RMC) via TCP/IP. The MEGA is server and Crestron is the client. It is a good alternative for to extend few and expensive relay ports that has Crestron. I need that the activities of these ports are recorded in a MySQL database, to make it, I configured the MEGA2560 as a client.
Now, I appeal to your generosity, could you advise me how to have both configurations in a single arduino sketch?
Regard, Johann.
http://forum.arduino.cc/index.php?topic=52065.15
http://www.crestron.com/products/model/qm-rmc
Excelente. Funcinou perfeitamente.