January 19, 2013
I will only ever be, half the Geek, I wished I was.
Fortunately this allows ample room to grow.
I go by a number of names, Fess_ter_Geek, Fess_ter, Fess, and at work, they call me Fesstus. I’m married with four, home schooled children, seven desktops, and two laptops in the house. I build my own desktops and usually overclock to boost the price/performance ratio.
The first pre-built, store bought, desktop that I purchased was a Packard-Bell 486sx 25Mhz sporting a 5.25in floppy and a 3.5in floppy. It did not come with a CD-Rom drive or a sound card. I had to add those later and I also upgraded the processor which was the start of my computer hardware knowledge that eventually lead me to build my own.
My first exposure to a computer was about 1979 when I was 11 years old. My Uncle Norm, sold computer learning systems to schools. So, as a salesman he had one for demonstration.

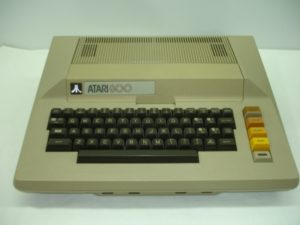
His was an ATARI 800, 8 bit computer. It was big, beige and brown and it was beautiful. When my mother and I would go and visit them, 3 hours away with a “55 stay alive” speed limit, I would stay up until 3 or 4am playing Star Raiders until my eyes bled.
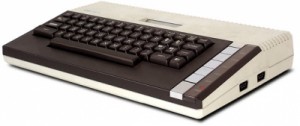
Around 1983-84 my mother relented and spoiled me with an ATARI 800xl of my own. It was a more modern looking machine although, disappointingly, it couldn’t run some of the original 800 software.

As I recall, some of the older titles could be run by using a “Translator” disk but there were others that wouldn’t run at all. I still have my old 800xl in the closet. Every four or five years or so, when the nostalgia hits me, I pull it out, plug it in, and relive a few old memories. I took that machine to college with me and turned in a crappy paper or two written on ATARI Writer word processor and printed on an ATARI daisy wheel printer. (Whrrrrrr chunk chunk chunk whrrrr)
After college, the procurement of employment, and marriage, I started to get into the “IBM” type of machines or “clones” as they used to be called. Today we call them “PCs” (pee-sees). My wife brought to the marriage, in her dowry, an actual IBM PS2 that cost as much as a used car. It was a 386 16 Mhz and sported the new IBM Micro Channel Architecture, MCA. IBM was going to change the industry with MCA. It was kind of like PCI slots. They were faster and “better” than ISA slots. But, the “industry” thought otherwise and MCA was short lived. The 386 had no sound card, most computers didn’t, and you couldn’t find one for it because there were very few MCA cards around. With no upgrade options this led me to buy the first Packard-Bell.
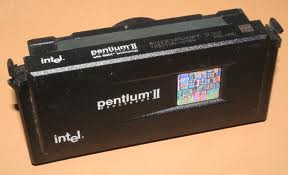
Over the years as computers got faster and my knowledge grew, I started learning about overclocking. When Intel came out with the Pentium II, their top end was a 450 Mhz processor. I was contemplating building two identical machines, one for my wife and one for me. It was going to cost a “Mint” for two top end processors. Fortunately, my timing and research revealed that Intel’s lower end processor, the Celeron 300a with a smaller on die cache could easily overclock to 450 Mhz and yield identical performance,and in some cases higher, than Intel’s PII 450. That was my first stellar overclock and price/performance, value success. In the years since, my system builds have migration between AMD and Intel systems depending on which one was deemed best at the time for the price/performance ratio. As of this writing I have both AMD and Intel systems running in my house.
In the last couple of years I have started tinkering with Arduino. If you have to ask, Google it.
I have been slowly remodeling my house. If you have ever dug remotely, into a home repair or modification job, you have likely found out that attempting to do one job usually reveals two other things that need fixing.
I like computer games, BF3, Flight Simulator, and others. One of my all time Uber Geek dreams is to build a full motion flight simulator platform. Oh yes, someday it will be mine and I will make it. In the mean time, I intend to learn to interface Arduino with Flight Simulator X via FSUIPC. Speaking of Flight Sim, at one time I was involved with a Virtual Airline on VATSIM and did a lot of PHP web work for our site, learning as I went. Then we had child number 4 and leisure time was gone. I learned just enough PHP/MYSQL to be dangerous but not proficient.
I play guitar, rhythm and chords mostly. If you don’t play guitar, I sound really good. If you do play guitar then, I’m just a hack like all my other “talents”.
Well that’s the start, anyway…

Thanks for a great resource. I am building a FS switch panel which includes an autopilot section. I’ve successfully prototyped the ‘Altitude Set’ function using a rotary encoder, and feedback to a max7219/7 segment display using your code.
I am now expanding that to multiple AP settings but it seems that JimNZ’s link2FS program does not appear to have codes for ‘Increment/Decrement Heading setting’. Were you able to achieve this using link2FS? Am I missing something?
Thanks
Jim McCarthy Wangandary Vic Australia
In Link2FS HDG up is A57, HDG down is A58. These work with stock aircraft and most other add on aircraft.
However, if you want to do this with the PMDG 737, these codes will NOT work.
There are a couple of ways to do it with the PMDG but you will need to search the mycockpit.org forum under Link2FS.
I focused my MCP to work with the MilViz 737-200.
At some point I may retro fit mine to the PMDG but my current interest is with the A2A Comanche. Also I had the PMDG for FSX and have since switched to P3D.
~Fess
My apologies for the late thankyou re my November post.
When I expand my encoder/MAX7219 setup from a single set (Altitude) to Alt/Heading/Airspeed/Vert.Speed, my displays show what looks like random data (part digits, wrong digits etc.) It appears to be a serial data timing problem. I am using a separate 5V supply for the MAX7219s with the ground common to the Arduino and have connected a 10uF Tantalum and 0.1uF Ceramic to the MAX Vcc and ground terminals in case power supply glitches might be the problem. Any ideas?
Jim,
Sorry for the late reply. If you haven’t fixed your problem yet… It could be a multitude of things.
1) If one thing worked and multiple things don’t. Go back and check the single operation again.
Then try a different single thing, then try two things.
2) When I get garbage, its sometimes the push on connectors. I think the pins come from the factory with a little residue.
Remove or wiggle the “push on” wire leads. If that is the issue, the solution is to solder the connections.
3) If it lights up all 8s 8888888 then you need to reset the Arduino.
4) Double and triple check your code. When doing code, there is a lot of copy, paste, change the variables. Make sure you changed the variables.
That’s a start…
~Fess